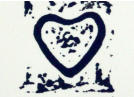
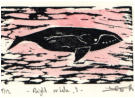
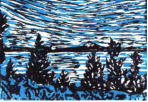
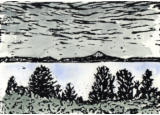
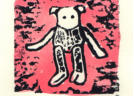
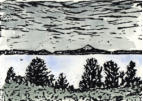
A linocut
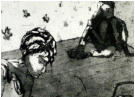
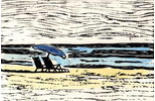
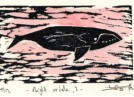
An etching with aquatint
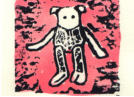
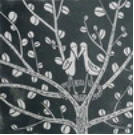
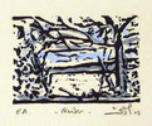
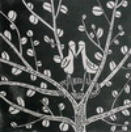
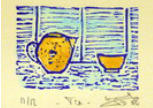
A linocut (with watercolor)
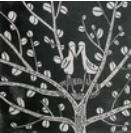
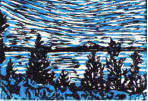
A woodcut (with watercolor)


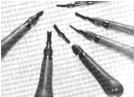
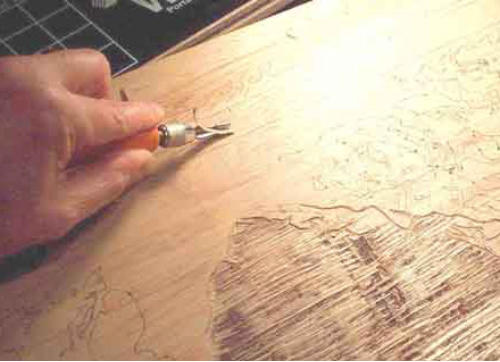
Cutting a woodblock with a gouge
“a” letter engraved in mirror than printed on paper

© Dominique Lecomte 2014
Relief printing techniques
Introduction
Once you ‘ll be done reading this rather long article, you’ll have a good idea of all the work involved in the creation of woodcuts, linocuts, and other prints made with relief printing techniques. If you want to know even more, you can consult The Woodcut Artist's Handbook: Techniques and Tools for Relief PrintmakingDefinition
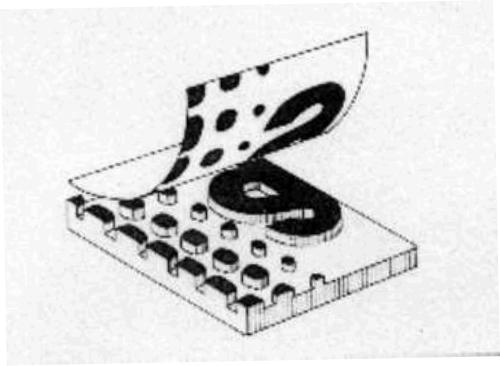
The technique used to make the prints showcased on this site is called relief printing technique, as you have to cut the wood or linoleum around the drawing in order for the image to appear in relief. This relief will then be inked, and used to make the basis of the final image, like in letter printing or stamping. In other words, you save your drawing, and get rid of the extra material around it. It is also called ""taille-d'épargne" from the French "'épargner" (saving) and "taille" (cut). FYI: The opposite technique is called intaglio or recess process and uses metal blocks engraved by acids (etchings, mezzotints, aquatint) or cold chisels (dry point, engraving); it allows for finer lines and shades of grey, as seen below. If you want to know more about these techniques, you can consult: The Art of Etching (Dover Art Instruction)Cutting
As you have to remove a lot of material from your block, relief printing techniques can only be used with "soft" materials like wood or linoleum, sometimes gerflex or PVC, rarely stone. NB: If you want to try out these techniques without spending a lot of money, try: Speedball Deluxe Block Printing KitPrinting
Once you are done with your cutting, or think you are, it is time to print.You will need a roller, some ink, a plate to spread the ink on it, a press, a wooden spoon or a baren, and some paper.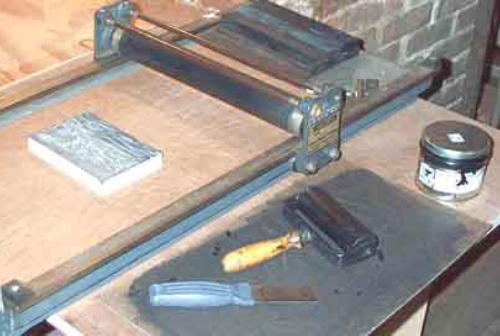 Put some ink on the plate, spread it using a roller until it is put evenly on the surface -and on your roller-, then roll your roller many times in
every direction on your block. Put a sheet of paper on your block, press it, lift slowly a corner of your paper to see if the pressure has been
sufficient to get the ink everywhere. If not, press again, then put the paper away when you are satisfied with the quality of the inking.
There are two types of ink: water based inks and oil based inks:
•
Water based inks are easy to use because you can clean your materials with water, and some give a result nearly as good as oil based inks once
dried. They also dry quicker than an oil based ink, but that can be a problem if you need a lot of time to complete your editions. If you are
thinking to work with watercolor on your prints, the watercolors will also sometimes dissolve the ink. Try this one, for example:Sax True Flow Water Soluble Block Printing Ink - 16 Ounces - Black
Put some ink on the plate, spread it using a roller until it is put evenly on the surface -and on your roller-, then roll your roller many times in
every direction on your block. Put a sheet of paper on your block, press it, lift slowly a corner of your paper to see if the pressure has been
sufficient to get the ink everywhere. If not, press again, then put the paper away when you are satisfied with the quality of the inking.
There are two types of ink: water based inks and oil based inks:
•
Water based inks are easy to use because you can clean your materials with water, and some give a result nearly as good as oil based inks once
dried. They also dry quicker than an oil based ink, but that can be a problem if you need a lot of time to complete your editions. If you are
thinking to work with watercolor on your prints, the watercolors will also sometimes dissolve the ink. Try this one, for example:Sax True Flow Water Soluble Block Printing Ink - 16 Ounces - BlackPrints in color
If you want to have a print in color, you can use watercolor or pencil color or whatever you think of, and work with them on your prints once they are dried. However, if you want to print with different colors of ink, you will have to make a different block for each colors, use a reduction technique, or use the white-line technique first experimented by Provincetown printmakers (from the town of Provincetown on Cape Cod, Massachusetts, USA) in the early 1900. • Multiple blocks: 1. First, do the main block, the one with the shapes, the one that generally will be printed in black, and print it on a tracing paper. Then put the tracing paper on a block of the same size, and press the inked picture on its surface: you will have a second block with the same picture as the one on your first block. Once the ink has dried, you can define which part of this picture will get the second color, and cut everything else. For a third color, do the same on a third block, and so on. 2. When you want to print these blocks, you will have first to define exactly where they will be put under the press, and find a means to fix your sheet of paper so you can lift it without moving it. On a flatbed cylinder press, it can easily be done as there are some clips to do that, but with another press or by hand, I would not recommend trying it as it is too difficult to fix the blocks and the paper without them moving at one point or another during the printing process. 3. Once you know where blocks and paper will go, you start to print one color, lift the paper, replace your first block with the second one inked with another color, press it, lift the paper, and so on until you are done with the different colors. Then you put another sheet of paper and do your second print the same way. 4. As it takes time to go from one color to the others, and one sheet of paper to the next one, it is better to use oil based inks that will not dried on your blocks between two uses, and it is also recommended that you start with the lighter colors. A print made with two blocks, one for the black, one for the blue Same print modified and hand colored with watercolor • Reduction technique: 1. I have never used this technique, also called "suicidal technique" as no mistake is allowed when you use it, so my explanations will be theoretical, but I have seen some results and the final print is often superb as the colors are very rich and nuanced. 2. NB: some printmakers that read my comments told me it is not that difficult, you just have to think backward and start from light tones to darker ones. Richard Kushinsky als told me it is a good idea to use sharpies to redo the lines on the block once you are satisfied with the drawing, otherwise the lines will disappear once you wash the plate (same recommendation for the next technique) 3. The idea is to use only one block, and to cut it as the print progress, or reduce it. 4. Each step of the cutting is printed, and the color goes on top of the previous one(s), so you must print the full edition from the start - plus a few copies to allow for printing mistakes- and be aware that you can never go back. It means that you must know in advance where the colors will be on the print, and how they will mix together in order to play with the transparencies and get rich tones at the end. It also means that you should better start with the lighter tones. 5. The first cut defines the whites and leave untouched the areas that will get the background or first color. The next cut adds details to the big areas by preserving lines that will be inked with a darker tone, and so on. If the first cut defines a big yellow area by leaving it untouched and inking the relief, the next cut can remove material in this area, leaving lines that will be inked with a darker tone. 6. It is a slow technique as you have to wait between each cut for the previous color to dry, and you have to clean and dry your block before cutting it again. 7. You must also be sure that paper and block will be positionned in the same fashion at each step, so if you cannot register your paper in one way or another, I do not know how you could use this technique. 8. NB: Again here, Richard Kushinsky -search him on the web to get more info- told me you can buy some register on the internet for a very reasonnable price, so it should solves this difficulty. He also recommended a new material made of rubber called "safety cut" or "easy cut", softer than linoleum or wood and easier to work according to him, but I had tried it already and found it too soft for my liking, so you will have to see for yourselves. • White line technique 1. It is also a technique that uses one block only, and you get a very unusual result with it as it combines printing and watercolor. Its name comes from the white lines that surround all the different colored areas, representing cuts defining these areas in the block, and allowing for inking them without spilling. 2. Each relief, once surrounded by cuts, is inked with a brush and watercolor. As watercolor dries quickly, you cannot color the whole block at once and/or you must color only small areas each time. 3. It is also a very slow technique as you must wait for each area to dry before inking the next one, then, once you first copy is made, clean the whole block and start again the same process for the next copy. It is the reason why most Provincetown printmakers were working on more than one image at the same time. 4. The paper is afixed on one side of the block so you are sure it will be positionned correctly each time, and it opens as a book to allow for drying.Numbering
Because you have to do a lot of thing by hand to get your prints, each print is different. Furthermore, each new print you make is generally darker or has more lines than the one you printed before because the block got more ink. To acknowledge this specificity, each print is numbered and considered as an original. • The first number is the place of the print, the second is the total of prints made: 3/6 means print #3 on a total of 6. • You are supposed to destroy your block once all the prints are made to insure any buyer that there will not be additional prints later. • You are also supposed to print a copy of this destroyed block to show that it has indeed be destroyed. • Anyhow, I do not know of any printer doing it, as it also means destroying your work. Most of them, I guess, keep their block and if the first edition is sold out, or if they see a new way to use this block, alter the first image and do a second edition, wich is also an original because something is different from the first one. Linocut, 1st edition Same linocut, 2nd edition • Beside these numbered prints, 10% of the total edition can be printed without number and will be called EA or AP (Exemplaire d'Artiste, or Artist Proof) • The first prints you made to see how was your cutting can be kept and called E.E. (Exemplaire d'Essais, or First Try ) but I generally do not keep them because there are not what I wanted to do and the paper I printed on is not a good one. • When I do an edition without numbering the prints, all prints are labbeled OE (Open Edition) All prints must be signed and dated, and they are also generally titled. There are different way of putting all those information below the print, but none is said to be better than the other. It is mainly a question of how you want the result to look like. In any case, it will always be written with a pencil. Linocut, number 11/12 Linocut, EARessources
Here is a recap of the ressources I cited in this article: The Woodcut Artist's Handbook: Techniques and Tools for Relief Printmaking
Images, Voyages, Impressions
Original Prints, Photos, Stories, to Smile, Share, Seduce


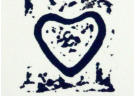
A linocut
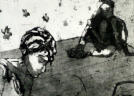
An etching with aquatint

A linocut (with watercolor)
A woodcut (with watercolor)


Cutting a woodblock with a gouge
“a” letter engraved in mirror than printed on paper

© Dominique Lecomte 2014
Relief printing techniques
Introduction
Once you ‘ll be done reading this rather long article, you’ll have a good idea of all the work involved in the creation of woodcuts, linocuts, and other prints made with relief printing techniques. If you want to know even more, you can consult The Woodcut Artist's Handbook: Techniques and Tools for Relief PrintmakingDefinition
The technique used to make the prints showcased on this site is called relief printing technique, as you have to cut the wood or linoleum around the drawing in order for the image to appear in relief. This relief will then be inked, and used to make the basis of the final image, like in letter printing or stamping. In other words, you save your drawing, and get rid of the extra material around it. It is also called ""taille-d'épargne" from the French "'épargner" (saving) and "taille" (cut). FYI: The opposite technique is called intaglio or recess process and uses metal blocks engraved by acids (etchings, mezzotints, aquatint) or cold chisels (dry point, engraving); it allows for finer lines and shades of grey, as seen below. If you want to know more about these techniques, you can consult: The Art of Etching (Dover Art Instruction)Cutting
As you have to remove a lot of material from your block, relief printing techniques can only be used with "soft" materials like wood or linoleum, sometimes gerflex or PVC, rarely stone. NB: If you want to try out these techniques without spending a lot of money, try: Speedball Deluxe Block Printing KitPrinting
Once you are done with your cutting, or think you are, it is time to print. You will need a roller, some ink, a plate to spread the ink on it, a press, a wooden spoon or a baren, and some paper.
Put some ink on the plate, spread it using a roller until it is put evenly
on the surface -and on your roller-, then roll your roller many times
in every direction on your block. Put a sheet of paper on your block,
press it, lift slowly a corner of your paper to see if the pressure has
been sufficient to get the ink everywhere. If not, press again, then
put the paper away when you are satisfied with the quality of the inking.
There are two types of ink: water based inks and oil based inks:
•
Water based inks are easy to use because you can clean your
materials with water, and some give a result nearly as good as oil based inks
once dried. They also dry quicker than an oil based ink, but that can be a
problem if you need a lot of time to complete your editions. If you are
thinking to work with watercolor on your prints, the watercolors will also
sometimes dissolve the ink. Try this one, for example:
Sax True Flow Water Soluble Block Printing Ink - 16 Ounces - BlackPrints in color
If you want to have a print in color, you can use watercolor or pencil color or whatever you think of, and work with them on your prints once they are dried. However, if you want to print with different colors of ink, you will have to make a different block for each colors, use a reduction technique, or use the white-line technique first experimented by Provincetown printmakers (from the town of Provincetown on Cape Cod, Massachusetts, USA) in the early 1900. • Multiple blocks: - First, do the main block, the one with the shapes, the one that generally will be printed in black, and print it on a tracing paper. Then put the tracing paper on a block of the same size, and press the inked picture on its surface: you will have a second block with the same picture as the one on your first block. Once the ink has dried, you can define which part of this picture will get the second color, and cut everything else. For a third color, do the same on a third block, and so on. - When you want to print these blocks, you will have first to define exactly where they will be put under the press, and find a means to fix your sheet of paper so you can lift it without moving it. On a flatbed cylinder press, it can easily be done as there are some clips to do that, but with another press or by hand, I would not recommend trying it as it is too difficult to fix the blocks and the paper without them moving at one point or another during the printing process. - Once you know where blocks and paper will go, you start to print one color, lift the paper, replace your first block with the second one inked with another color, press it, lift the paper, and so on until you are done with the different colors. Then you put another sheet of paper and do your second print the same way. - As it takes time to go from one color to the others, and one sheet of paper to the next one, it is better to use oil based inks that will not dried on your blocks between two uses, and it is also recommended that you start with the lighter colors. A print made with two Same print modified and hand colored with watercolor blocks, one for the black, one for the blue • Reduction technique: - I have never used this technique, also called "suicidal technique" as no mistake is allowed when you use it, so my explanations will be theoretical, but I have seen some results and the final print is often superb as the colors are very rich and nuanced. - NB: some printmakers that read my comments told me it is not that difficult, you just have to think backward and start from light tones to darker ones. Richard Kushinsky als told me it is a good idea to use sharpies to redo the lines on the block once you are satisfied with the drawing, otherwise the lines will disappear once you wash the plate (same recommendation for the next technique) - The idea is to use only one block, and to cut it as the print progress, or reduce it. = Each step of the cutting is printed, and the color goes on top of the previous one(s), so you must print the full edition from the start -plus a few copies to allow for printing mistakes- and be aware that you can never go back. It means that you must know in advance where the colors will be on the print, and how they will mix together in order to play with the transparencies and get rich tones at the end. It also means that you should better start with the lighter tones. - The first cut defines the whites and leave untouched the areas that will get the background or first color. The next cut adds details to the big areas by preserving lines that will be inked with a darker tone, and so on. If the first cut defines a big yellow area by leaving it untouched and inking the relief, the next cut can remove material in this area, leaving lines that will be inked with a darker tone. - It is a slow technique as you have to wait between each cut for the previous color to dry, and you have to clean and dry your block before cutting it again. - You must also be sure that paper and block will be positionned in the same fashion at each step, so if you cannot register your paper in one way or another, I do not know how you could use this technique. - NB: Again here, Richard Kushinsky -search him on the web to get more info- told me you can buy some register on the internet for a very reasonnable price, so it should solves this difficulty. He also recommended a new material made of rubber called "safety cut" or "easy cut", softer than linoleum or wood and easier to work according to him, but I had tried it already and found it too soft for my liking, so you will have to see for yourselves. • White line technique - It is also a technique that uses one block only, and you get a very unusual result with it as it combines printing and watercolor. Its name comes from the white lines that surround all the different colored areas, representing cuts defining these areas in the block, and allowing for inking them without spilling. - Each relief, once surrounded by cuts, is inked with a brush and watercolor. As watercolor dries quickly, you cannot color the whole block at once and/or you must color only small areas each time. - It is also a very slow technique as you must wait for each area to dry before inking the next one, then, once you first copy is made, clean the whole block and start again the same process for the next copy. It is the reason why most Provincetown printmakers were working on more than one image at the same time. - The paper is afixed on one side of the block so you are sure it will be positionned correctly each time, and it opens as a book to allow for drying.Numbering
Because you have to do a lot of thing by hand to get your prints, each print is different. Furthermore, each new print you make is generally darker or has more lines than the one you printed before because the block got more ink. To acknowledge this specificity, each print is numbered and considered as an original. • The first number is the place of the print, the second is the total of prints made: 3/6 means print #3 on a total of 6. • You are supposed to destroy your block once all the prints are made to insure any buyer that there will not be additional prints later. • You are also supposed to print a copy of this destroyed block to show that it has indeed be destroyed. • Anyhow, I do not know of any printer doing it, as it also means destroying your work. Most of them, I guess, keep their block and if the first edition is sold out, or if they see a new way to use this block, alter the first image and do a second edition, wich is also an original because something is different from the first one. Linocut, 1st edition Same linocut, 2nd edition • Beside these numbered prints, 10% of the total edition can be printed without number and will be called EA or AP (Exemplaire d'Artiste, or Artist Proof) • The first prints you made to see how was your cutting can be kept and called E.E. (Exemplaire d'Essais, or First Try ) but I generally do not keep them because there are not what I wanted to do and the paper I printed on is not a good one. • When I do an edition without numbering the prints, all prints are labbeled OE (Open Edition) All prints must be signed and dated, and they are also generally titled. There are different way of putting all those information below the print, but none is said to be better than the other. It is mainly a question of how you want the result to look like. In any case, it will always be written with a pencil. Linocut, number 11/12 Linocut, EARessources
Here is a recap of the ressources I cited in this article: The Woodcut Artist's Handbook: Techniques and Tools for Relief Printmaking
Images, Voyages, Impressions
Original Prints, Photos, Stories, to Smile, Share, Seduce